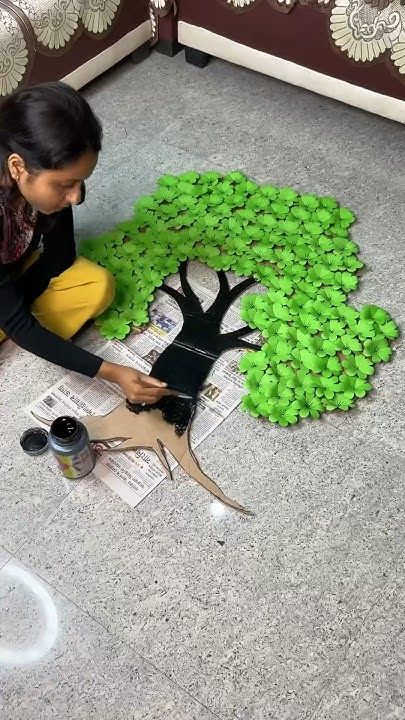
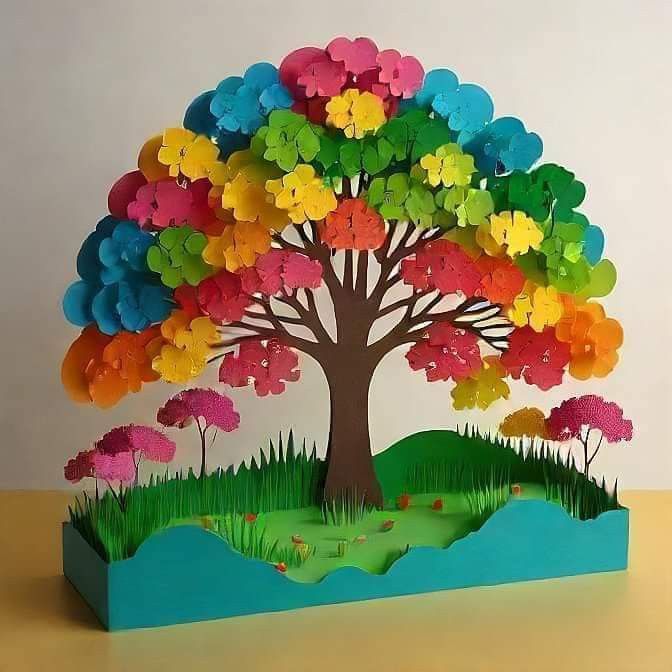
If you’re looking for a creative way to enhance your home decor, making a beautiful paper tree art piece is a fantastic option. This DIY art and craft is easy, affordable, and allows you to personalize your artwork to match your aesthetic. Whether you’re an art enthusiast or just want to try something new, this guide will walk you through the process step by step. Paper tree art is a fantastic way to bring creativity into your space. It’s simple to make, highly customizable, and perfect for both beginners and experienced crafters. Try this DIY project today and add a touch of handmade charm to your home decor!
Materials Needed
To get started, gather the following materials:
Colored construction paper or cardstock (brown for the trunk, green for the leaves, or any other colors of your choice)
- Scissors
- Glue stick or liquid glue
- Pencil and eraser
- Ruler (optional)
- Decorative elements (glitter, sequins, or markers for added details)
Step-by-Step Instructions
Step 1: Sketch the Tree Structure
Begin by lightly sketching the outline of your tree on a piece of paper. Start with the trunk and then draw several branches extending outward. If you’re using a printed template, place it under your work surface as a guide.
Step 2: Cut Out the Tree Trunk and Branches
Using brown construction paper, cut out the trunk and branches of your tree. You can make the branches thick or thin depending on the design you prefer. If you want a more textured look, try tearing the paper instead of cutting it for a more natural effect.
Step 3: Create the Leaves
Take the green construction paper and cut out small leaf shapes. You can experiment with different leaf sizes to add variety and depth to your artwork. If you prefer a seasonal look, use red, orange, and yellow paper for an autumn tree.
Step 4: Assemble Your Paper Tree
Carefully glue the tree trunk onto your base paper. Next, start attaching the branches, making sure they spread naturally. Finally, arrange the leaves on the branches, overlapping some to create a fuller look. Be creative with placement to make your tree appear lively and dynamic.
Step 5: Add Final Touches
To enhance your tree, consider adding decorative elements such as glitter for a magical touch or sequins to mimic flowers. You can also use colored markers to add shading and texture to your leaves and trunk. If you’d like, draw additional details such as birds, clouds, or grass to complete the scene.
- Tips for a Stunning Paper Tree Art
- Use different shades of green for a realistic effect.
- Experiment with layered paper to add dimension.
- Try folding or curling the edges of leaves to give them a 3D look.
- Mount your paper tree onto a colored background for extra contrast.
- Frame your finished piece to create a beautiful wall decoration.

Creating beautiful paper tree art and crafts is a fun and creative way to decorate your home, office, or classroom. This simple DIY project allows you to craft stunning tree designs using just paper and a few basic materials. Whether you’re a beginner or an experienced crafter, this guide will help you bring your artistic vision to life.

Paper tree art is an enjoyable and rewarding craft that allows for endless creativity. Whether you’re making it as a personal art project or with kids for a fun activity, this DIY decor will add charm to any space. Give it a try, and let your imagination take root!